
React使ってSPAを作るよ(4)の続きです。
なんとかReactでレンダリングができた
さっそく、残りのパーツをすべて組み込んじゃいましょう。
JSONがとうとうこんなに長くなってしまいました…
ぜひとも外部ファイル化したいですね。
tagDataと、markDataのふたつをネストしました。
var articleData = [
  {
    articleTitle: "記事その1タイトル",
    articleUrl: "記事その1URL",
    articleDescription: "記事その1description",
    articleImage: "https://source.unsplash.com/random",
    tagData: [
      {
      tag: "タグ1",
      tagUrl: ""
      },
      {
      tag: "タグ2",
      tagUrl: ""
      },
      {
      tag: "タグ3",
      tagUrl: ""
      }
    ],
    markData: [
      {
       account: "ユーザー1-1",
       accountImage: "https://source.unsplash.com/random"
      },
      {
       account: "ユーザー1-2",
       accountImage: "https://source.unsplash.com/random"
      },
      {
       account: "ユーザー1-3",
       accountImage: "https://source.unsplash.com/random"
      }
    ],
    commentData: [
      {
       author: "その1ユーザー1",
       authorImage: "https://source.unsplash.com/random",
       comment: "その1コメント1"
      },
      {
       author: "その1ユーザー2",
       authorImage: "https://source.unsplash.com/random",
       comment: "その1コメント2"
      },
      {
       author: "その1ユーザー3",
       authorImage: "https://source.unsplash.com/random",
       comment: "その1コメント3"
      }
    ]
  },
  {
    articleTitle: "記事その2タイトル",
    articleUrl: "記事その2URL",
    articleDescription: "記事その2description",
    articleImage: "https://source.unsplash.com/random",
    tagData: [
      {
      tag: "タグ1",
      tagUrl: ""
      },
      {
      tag: "タグ2",
      tagUrl: ""
      },
      {
      tag: "タグ3",
      tagUrl: ""
      }
    ],
    markData: [
      {
       account: "ユーザー2-1",
       accountImage: "https://source.unsplash.com/random"
      },
      {
       account: "ユーザー2-2",
       accountImage: "https://source.unsplash.com/random"
      },
      {
       account: "ユーザー2-3",
       accountImage: "https://source.unsplash.com/random"
      }
    ],
    commentData: [
      {
       author: "その2ユーザー1",
       authorImage: "https://source.unsplash.com/random",
       comment: "その2コメント1"
      },
      {
       author: "その2ユーザー2",
       authorImage: "https://source.unsplash.com/random",
       comment: "その2コメント2"
      },
      {
       author: "その2ユーザー3",
       authorImage: "https://source.unsplash.com/random",
       comment: "その2コメント3"
      }
    ]
  },
  {
    articleTitle: "記事その3タイトル",
    articleUrl: "記事その3URL",
    articleDescription: "記事その3description",
    articleImage: "https://source.unsplash.com/random",
    tagData: [
      {
      tag: "タグ1",
      tagUrl: ""
      },
      {
      tag: "タグ2",
      tagUrl: ""
      },
      {
      tag: "タグ3",
      tagUrl: ""
      }
    ],
    markData: [
      {
       account: "ユーザー3-1",
       accountImage: "https://source.unsplash.com/random"
      },
      {
       account: "ユーザー3-2",
       accountImage: "https://source.unsplash.com/random"
      },
      {
       account: "ユーザー3-3",
       accountImage: "https://source.unsplash.com/random"
      }
    ],
    commentData: [
      {
       author: "その3ユーザー1",
       authorImage: "https://source.unsplash.com/random",
       comment: "その3コメント1"
      },
      {
       author: "その3ユーザー2",
       authorImage: "https://source.unsplash.com/random",
       comment: "その3コメント2"
      },
      {
       author: "その3ユーザー3",
       authorImage: "https://source.unsplash.com/random",
       comment: "その3コメント3"
      }
    ]
  }
];
追加のコンポーネントを書いていきます。
//タグ
var Tag = React.createClass({
  render: function() {
    return (
      <li data-tag={this.props.tag}><a href={this.props.tagUrl}>{this.props.tag}</a></li>
    )
  }
});

//タグリスト
var TagList = React.createClass({
  render: function() {
    var tagNodes = this.props.data.map(function(tag) {
      return (
        <Tag tag={tag.tag} tagUrl={tag.tagUrl} />
      )
    });
    return (
      <ul className="tag-list">
        {tagNodes}
      </ul>
    )
  }
});
タグリストのコンポーネントと、
//読んだ人
var Mark = React.createClass({
  render: function() {
    var accountImage = {
      backgroundImage : "url(" + this.props.accountImage + ")"
    };
    return (
      <li data-account={this.props.account} style={accountImage}></li>
    )
  }
});

//読んだ人リスト
var MarkList = React.createClass({
  render: function() {
    var markNodes = this.props.data.map(function(mark) {
      return (
        <Mark account={mark.account} accountImage={mark.accountImage} />
      )
    });
    return (
      <ul className="account-list">
        {markNodes}
      </ul>
    )
  }
});
読んだ人リストのコンポーネントを追加しました。
//記事コンポーネント
var ArticleList = React.createClass({
  render: function() {
    var articleImage = {
      backgroundImage : "url(" + this.props.articleImage + ")"
    };
    return (
    <li>
      <article>
        <a href={this.props.articleUrl} target="_blank" style={articleImage}>
          <h2>{this.props.articleTitle}</h2>
          <p>{this.props.articleDescription}</p>
        </a>
        <TagList data={this.props.articleTag} />
        <h3>読んだ</h3>
        <MarkList data={this.props.articleMark} />
        <h3>コメント</h3>
        <CommentList data={this.props.articleComment} />
      </article>
    </li>
    );
  }
});
記事コンポーネントでそれぞれのコンポーネントを包括して、見出しのh3も追加しました。
そして最後に、JSONのデータを渡すのを忘れずに…
//記事リストコンポーネント
var ArticleArea = React.createClass({
  render: function() {
    var articleNodes = this.props.data.map(function(article) {
      return (
        <ArticleList articleTag={article.tagData} articleMark={article.markData} articleComment={article.commentData} articleTitle={article.articleTitle} articleUrl={article.articleUrl} articleDescription={article.articleDescription} articleImage={article.articleImage} />
      )
    });
    return (
    <ul id="article-list">
      {articleNodes}
    </ul>
    )
  }
});
articleTag={article.tagData} articleMark={article.markData}を追加しましたよ。
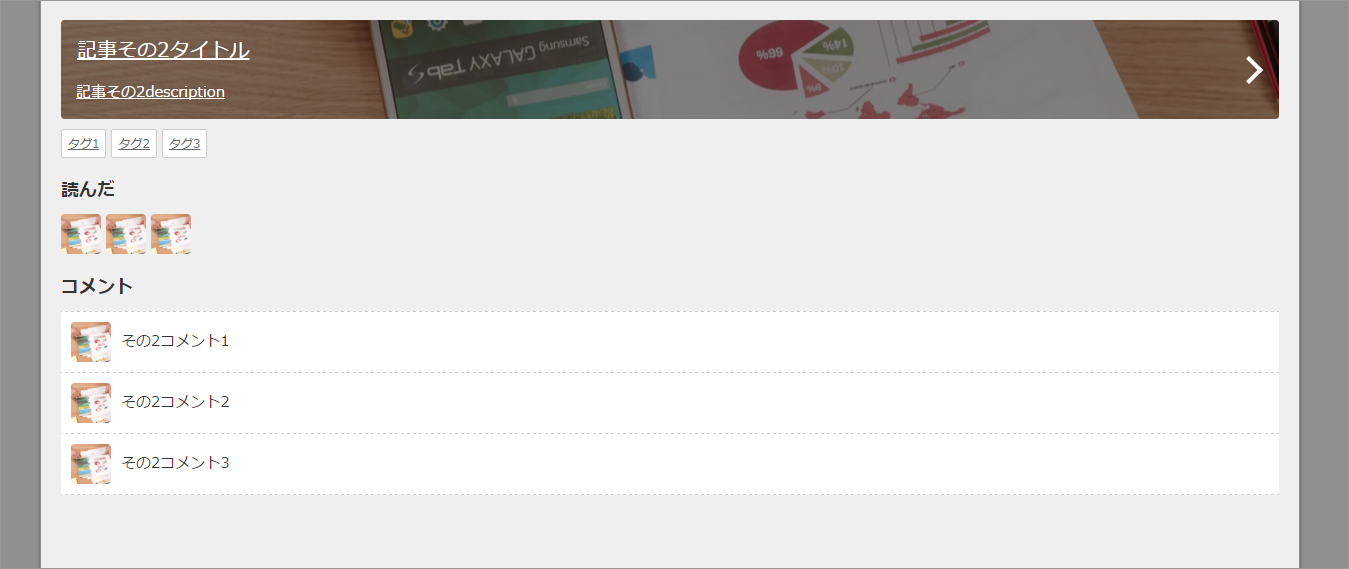
ここまでくると、モックと同じ要素が揃いましたね!
ブラウザで見たらこんな感じになりました。
脱線して横並びリストの話
ちょっとここで脱線しますが、意外とこれを知らなくて躓く人が多いので触れておきます。
今回のタグリストや読んだ人リストのような、横並びにしたリストで、ときどき困ることがあります。
それは、謎のmargin。
今回まででできた画面と、モックのCodePenの画面、よ~く見ると、ちょっと違いませんか?
li要素同士の空き幅が、モックの方が広くなっています。
これ、実は意外な原因、「ソースコード上の改行」のせいで起こっているんです!
liを横並びにするとき、display:inline-block;の指定をすると、liがテキストの1文字のように扱われて横に並んでいきます。
改行は見た目にはわかりませんが、改行コードが文字(テキストノード)の1要素として扱われてしまい、liとliの間に挟まってしまうのです。
親要素の幅や、リストの幅をきっちり指定しているはずなのにどうしても右端の要素が入りきらずに折り返されてしまう、なんてことありませんか?
その場合、ほとんどはこれが原因だったりします。
これを知らないと、改行による隙間がある状態のままCSSを調整していて、ブラウザによって崩れたり崩れなかったりと差異が出てしまいさらに困ったことになる場合もあります。
つまり、モックのソースのように
   <ul class="tag-list">
      <li data-tag="タグ1"><a href="">タグ1</a></li>
      <li data-tag="タグ2"><a href="">タグ2</a></li>
      <li data-tag="タグ3"><a href="">タグ3</a></li>
    </ul>
liを閉じたあと改行していると、幅が生まれます。
本当は閉じタグと次の要素の開始タグの間は無視してほしいですが、テキストを直接流し込んだ場合にも仮想block要素として扱われるのと同じことだと思えば仕方ないことかも…
これを解消するためにletter-spacingを調整したりする手法もあるのですが、それはそれで不要な指定なので、もっと単純に
   <ul class="tag-list">
      <li data-tag="タグ1"><a href="">タグ1</a></li><li data-tag="タグ2"><a href="">タグ2</a></li><li data-tag="タグ3"><a href="">タグ3</a></li>
    </ul>
改行をなくす…とするのが良いでしょう…ファイルを開いたときに見た目が…とか、編集しづらい…とかありますが…
個人でちまちま静的ページを作ってるときならいいんですが、それなりのプロジェクトでテンプレートエンジンを使う場合は、エンジニアさんがこれを知らないとご丁寧に改行してしまって崩れちゃうなんてことが起こったりします。
smartyを使っていたプロジェクトのとき、問題が起こるたび、エンジニアさんひとりひとりに毎回毎回「{strip}を使ってくれ!」と説明していました。{strip}で挟むとホワイトスペースやキャリッジリターンを無視してくれるんですね。
そして、Angularを使ったプロジェクトになって、そのへんの事情を知っているエンジニアさんに「{strip}みたいなやつないの?」と聞いたら、「それが、調べてるんだけど見つからないんだよね~、もしかしたらそういう機能ないのかも?」と言われて絶句しました。
いや、そんなまさか…Angularに詳しい方なら方法を知っているかもしれません…しかしそのプロジェクトが始まったとき、ほとんど誰も経験がない状態でAngularが採用されてしまったために誰もわからず、とうとう私がプロジェクトを離れるまで解決しませんでした。
きっと今でもviewの中でベタ書きされた</li><li>が動いているのでしょう…
Angular識者の方、誰か教えてください…
そういったこともあって私のAngularアレルギーがひどくなったように思います。
長々と説明しましたが、とにかく、Reactでレンダリングした要素は何も対策しなくても隙間が空かないのが素晴らしいです!。゚(゚´Д`゚)゚。
これだけでもWebデザイナーはReact推しになるわ!!
JSONを外部ファイルにする
…ご、ごめんなさい…今回のJSXのソースが長くなってしまったのでこれは次回にまわします(;´Д`)